Deploy To Ubuntu VPS Without Docker
Requirements#
- A server running ubuntu
- SSH access to the server from a local terminal
- A project hosted with git (GitHub/GitLab/Bitbucket etc)
- Nginx(recomended) or apache2
- PHP 8.x
- MySQL
- Adminer(optional)
- Composer
- Node
- NPM or Yarn
If LEMP (Linux, Nginx, MySQL and PHP) is not installed on your server, you can follow these steps.
Log in to your server#
- Login to your server using ssh from a terminal. I recommend that you set up ssh keys on your server from the server monitoring dashboard if your service provider supports it.
ssh username@serveripaddress
- Update your package manager.
sudo apt-get update
Install Nginx#
- Because Nginx is available in Ubuntu’s default repositories, it is possible to install it from these repositories using the apt packaging system.
sudo apt install nginx- Change owner folder /var/www.
sudo chown -R www-data:www-data /var/www- Change access permissions to make it accessible.
sudo chmod -R 775 /var/www- Add the user to the www-data group so that the user can edit files in the /var/www folder. Change 'yourUsername' with your username ubuntu.
sudo usermod -a -G www-data 'Username'
Install PHP 8.x#
In the documentation, we use mysql PHP 8.1. You can use another version.
- Install software-properties-common, which adds management for additional software sources.
sudo apt install software-properties-common- Install the repository ppa:ondrej/php, which will give you all your versions of PHP.
sudo add-apt-repository ppa:ondrej/php- Update apt again so your package manager can see the newly listed packages.
sudo apt update- Now you’re ready to install PHP 8.1 and install additional modules.
sudo apt install php8.1-fpm php8.1-mysql php8.1-curl php8.1-gd php8.1-mbstring php8.1-mcrypt php8.1-xml php8.1-xmlrpc php8.1-zipInstall MySQL#
In the documentation, we use mysql to store data. You can also use postgreSQL and sqlite.
- If mysql-server is not installed on the server, run this command to install mysql-server.
sudo apt install mysql-server- When you’re finished, Test if you’re able to log in to the MySQL console by typing:
sudo mysql- You can always create a user that authenticates with caching_sha2_plugin and then ALTER it later on with this command:
ALTER USER 'root'@'localhost' IDENTIFIED WITH mysql_native_password BY 'ChangeWithYourPassword';- Following this, it’s good practice to run the FLUSH PRIVILEGES command. This will free up any memory that the server cached as a result of the preceding CREATE USER and GRANT statements.
FLUSH PRIVILEGES;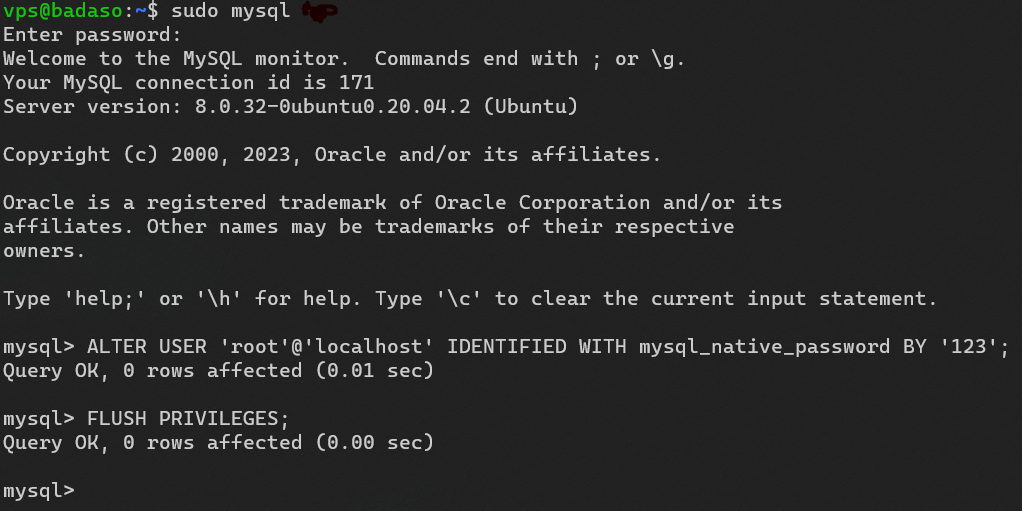
Install Adminer (Optional)#
- Create an adminer folder inside the /var/www/ folder to hold the adminer files.
mkdir /var/www/adminer- Go to the /var/www/adminer folder
cd /var/www/adminer- Download the adminer file so that the adminer can be installed on the server.
wget http://www.adminer.org/latest.php -O /var/www/adminer/adminer.php- Rename the file adminer.php to index.php so that the file can be read directly by the server.
mv adminer.php index.php- Change owner file /var/www/adminer/index.php
sudo chown www-data:www-data /var/www/adminer/index.php- Change access permissions to make it accessible.
sudo chmod 755 /var/www/adminer/index.php
sudo service nginx reload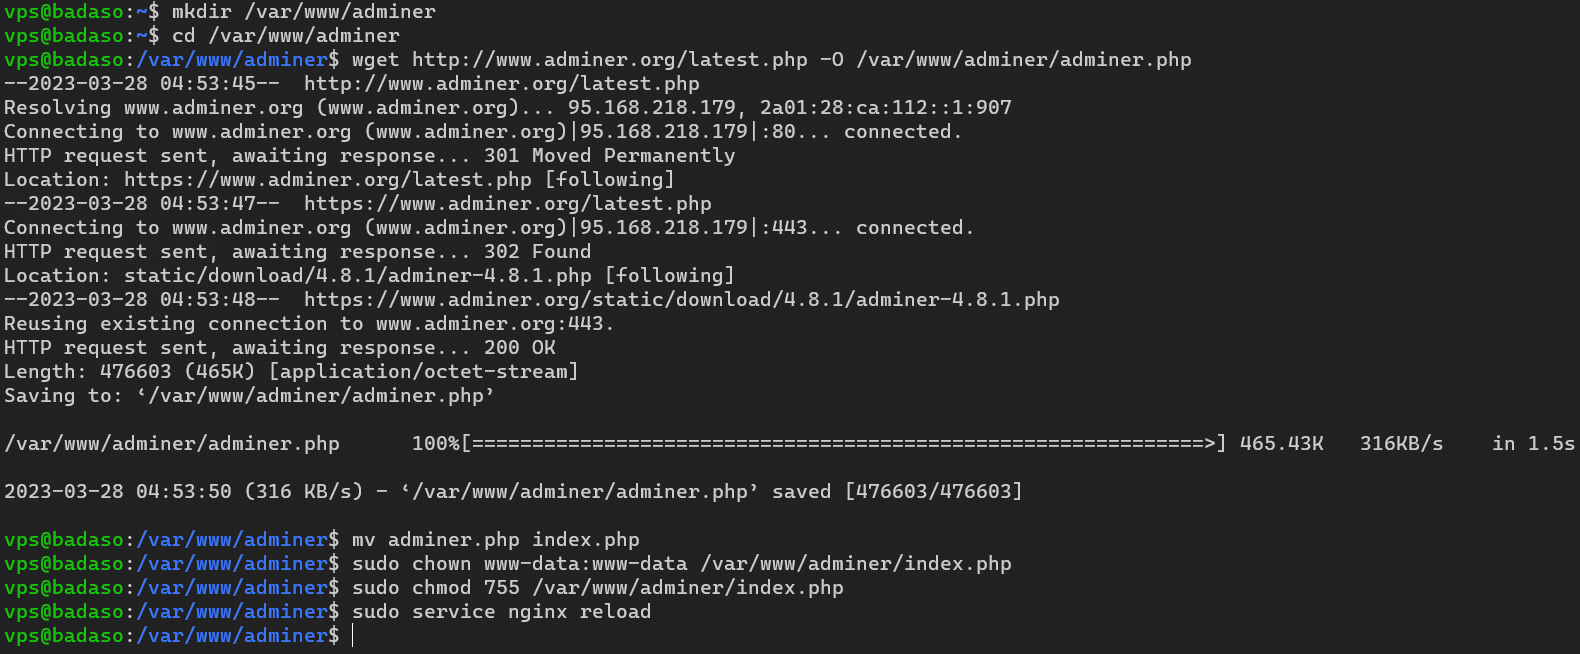
Setup NGINX for adminer (if you use adminer)#
- Go to directory /etc/nginx/sites-available. Then, add the file.
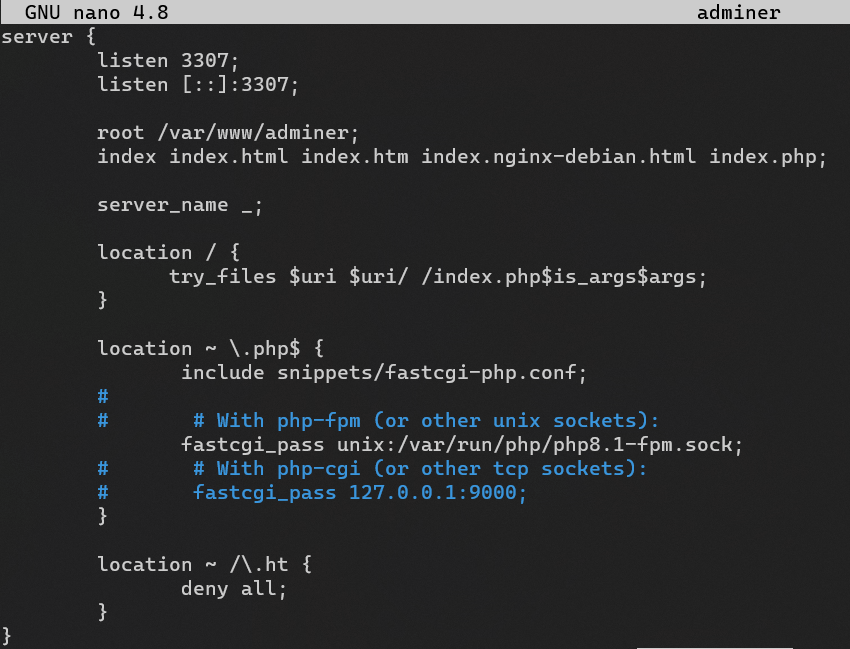
cd /etc/nginx/sites-availablesudo nano adminer
- You can follow this step to replace it.
server {        listen 3307;        listen [::]:3307;
        root /var/www/adminer;        index index.html index.htm index.nginx-debian.html index.php;
        server_name _;
        location / {              try_files $uri $uri/ /index.php$is_args$args;        }
        location ~ \.php$ {               include snippets/fastcgi-php.conf;        #        #       # With php-fpm (or other unix sockets):               fastcgi_pass unix:/var/run/php/php8.1-fpm.sock;        #       # With php-cgi (or other tcp sockets):        #       fastcgi_pass 127.0.0.1:9000;        }
location ~ /\.ht { deny all; }}listen : You can change the port according to your needs. For example we use port 3307. server_name : You can change with your domain. Because in this example it doesn't have a domain, the server_name is left blank and we use port 3307 to access the adminer.
- Activate both configurations by creating a link file in /etc/nginx/site-enabled/.
ln -s /etc/nginx/site-available/adminer /etc/nginx/site-enabled/adminer
- Configuration test.
sudo nginx -tIf the configuration is valid, you will get:
nginx: the configuration file /etc/nginx/nginx.conf syntax is oknginx: configuration file /etc/nginx/nginx.conf test is successful- Reload NGINX.
service nginx reload
- You can access adminer by opening your-ip:3307.
your-ip:3307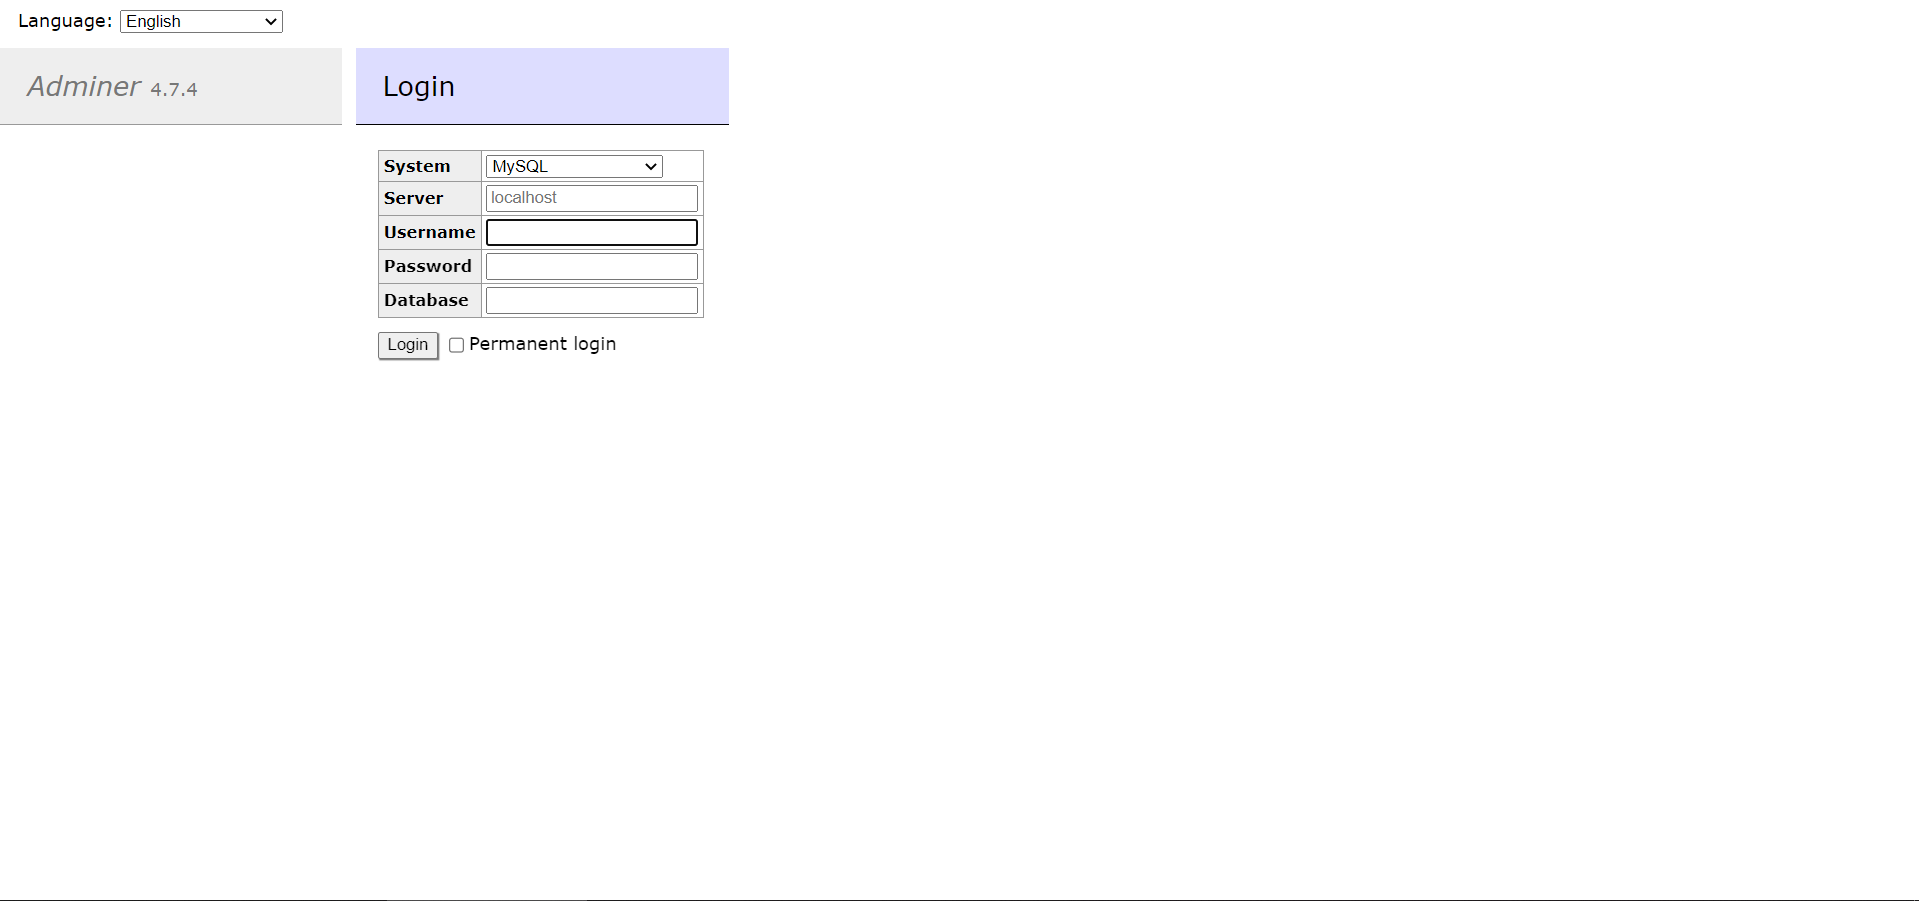
Install Composer#
- To quickly install Composer in the current directory, run the following script in your terminal.
php -r "copy('https://getcomposer.org/installer', 'composer-setup.php');"php -r "if (hash_file('sha384', 'composer-setup.php') === '55ce33d7678c5a611085589f1f3ddf8b3c52d662cd01d4ba75c0ee0459970c2200a51f492d557530c71c15d8dba01eae') { echo 'Installer verified'; } else { echo 'Installer corrupt'; unlink('composer-setup.php'); } echo PHP_EOL;"php composer-setup.phpphp -r "unlink('composer-setup.php');"- Most likely, you want to put the composer.phar into a directory on your PATH, so you can simply call composer from any directory (Global install).
sudo mv composer.phar /usr/bin/composer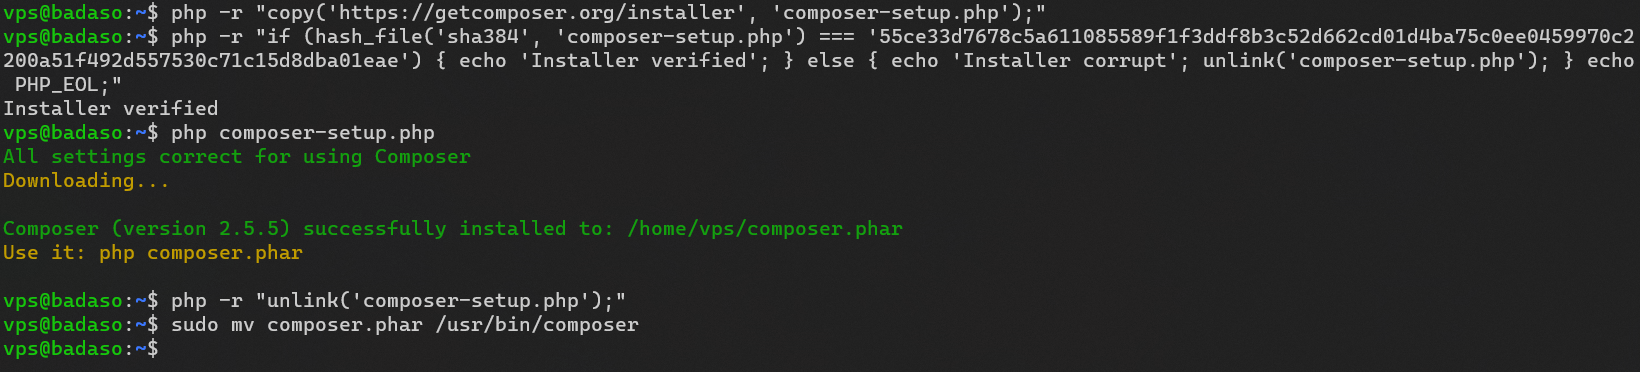
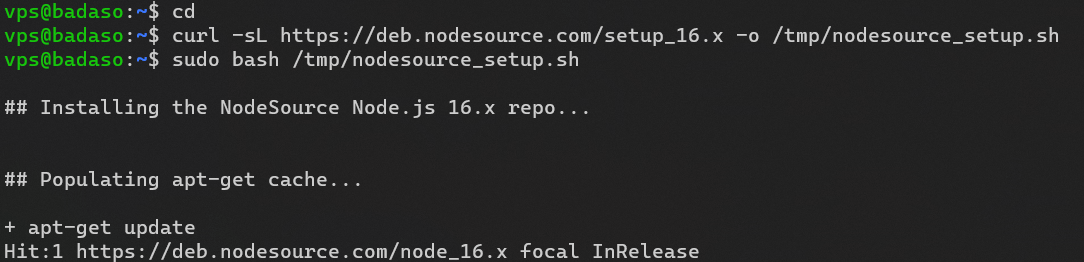
Install Node#
In the documentation, we use Node version 16.
- Install the PPA to get access to its packages. From your home directory, use curl to retrieve the installation script for your preferred version, making sure to replace 16.x with your preferred version string.
cd ~curl -sL https://deb.nodesource.com/setup_16.x -o /tmp/nodesource_setup.sh- Run the script. The PPA will be added to your configuration and your local package cache will be updated automatically.
sudo bash /tmp/nodesource_setup.sh- Install NodeJs
sudo apt install nodejsDeploy your project to vps (server)#
Clone Project#
- Clone your project to the /var/www folder and give it a project name. For example we cloned the project from gitlab.
cd /var/wwwsudo git clone {link-your-project-badaso-from-github-or-gitlab} your-name-project
Change access permission dicretory#
- Change owner file /var/www/your-name-project
sudo chown <username>:www-data your-name-project
- Change access permissions to make it accessible.
sudo apt install aclsudo setfacl -Rm u:www-data:rwx your-name-project
Setup NGINX for your project#
- Go to directory /etc/nginx/sites-available
cd /etc/nginx/sites-available- Copy file default with your project name.
sudo cp default your-name-project
- Edit the file.
sudo nano your-name-project
- You can follow this step to replace it.
server {        listen 80;        listen [::]:80;
        root /var/www/{your-project-name}/public;        index index.html index.htm index.nginx-debian.html index.php;
        server_name www.{your-domain} {your-domain};
        location / {              try_files $uri $uri/ /index.php$is_args$args;        }
        location ~ \.php$ {               include snippets/fastcgi-php.conf;        #        #       # With php-fpm (or other unix sockets):               fastcgi_pass unix:/var/run/php/php8.1-fpm.sock;        #       # With php-cgi (or other tcp sockets):        #       fastcgi_pass 127.0.0.1:9000;        }
location ~ /\.ht { deny all; }}your-project-name : Change with your-project-name directory. your-domain : Change with your domain.

- Activate both configurations by creating a link file in /etc/nginx/site-enabled/.
ln -s /etc/nginx/site-available/your-name-project /etc/nginx/site-enabled/your-name-project
- Configuration test.
sudo nginx -tIf the configuration is valid, you will get:
nginx: the configuration file /etc/nginx/nginx.conf syntax is oknginx: configuration file /etc/nginx/nginx.conf test is successful- Reload NGINX.
service nginx reload
Setup environment#
- Copy .env.example to .env and xhange the necessary env variables.
cd /var/www/your-project-namecp .env.example .envnano .env
- Change the following variables, as well as other variables that you may have to change such as database, AWS, Redis, mail, pusher configs.
APP_ENV=productionAPP_DEBUG=falseAPP_URL=your-hostname
DB_DATABASE=your-databaseDB_USERNAME=usernameDB_PASSWORD=password
FILESYSTEM_DRIVER=public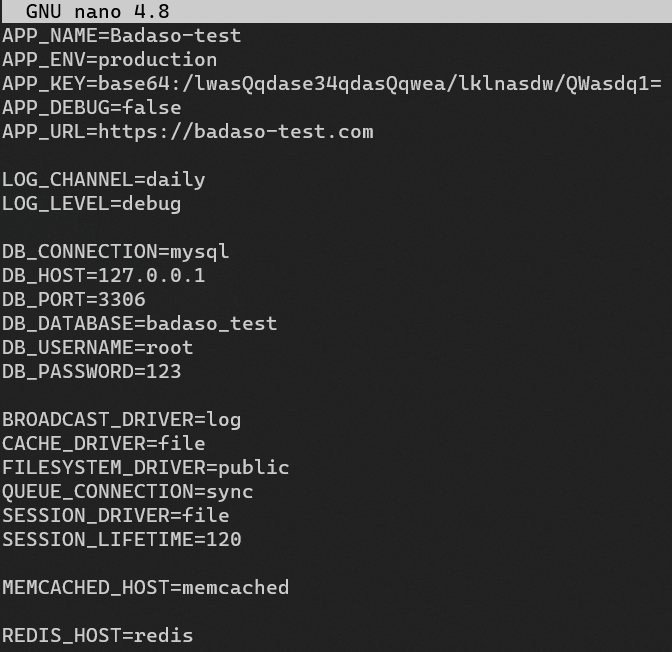
- Run composer install for compile composer.json
composer install- Run command to generate the key.
php artisan key:generate- Run database migration.
php artisan migrate- Run commmand below to generate token jwt.
php artisan jwt:secret -f- Run commmand below to generate link storage.
php artisan storage:link- Run database seeder.
php artisan db:seed --class="Database\Seeders\Badaso\BadasoSeeder"php artisan db:seed --class="your-seeder"- Run the following command to install all javascript of dependencies.
npm installnpm run prod- Finish and you can access your project.