Database Management
Badaso provides awesome database management features that can create tables, modify tables, delete tables, migrate tables, and delete migration files. Simply put, Badaso provides database management features without the need to create migration files using artisan laravel.
You can visit it in the menu Configuration -> Database Management and you will see your current table in the database. You can also click the Add Table button to create a new table in your database.
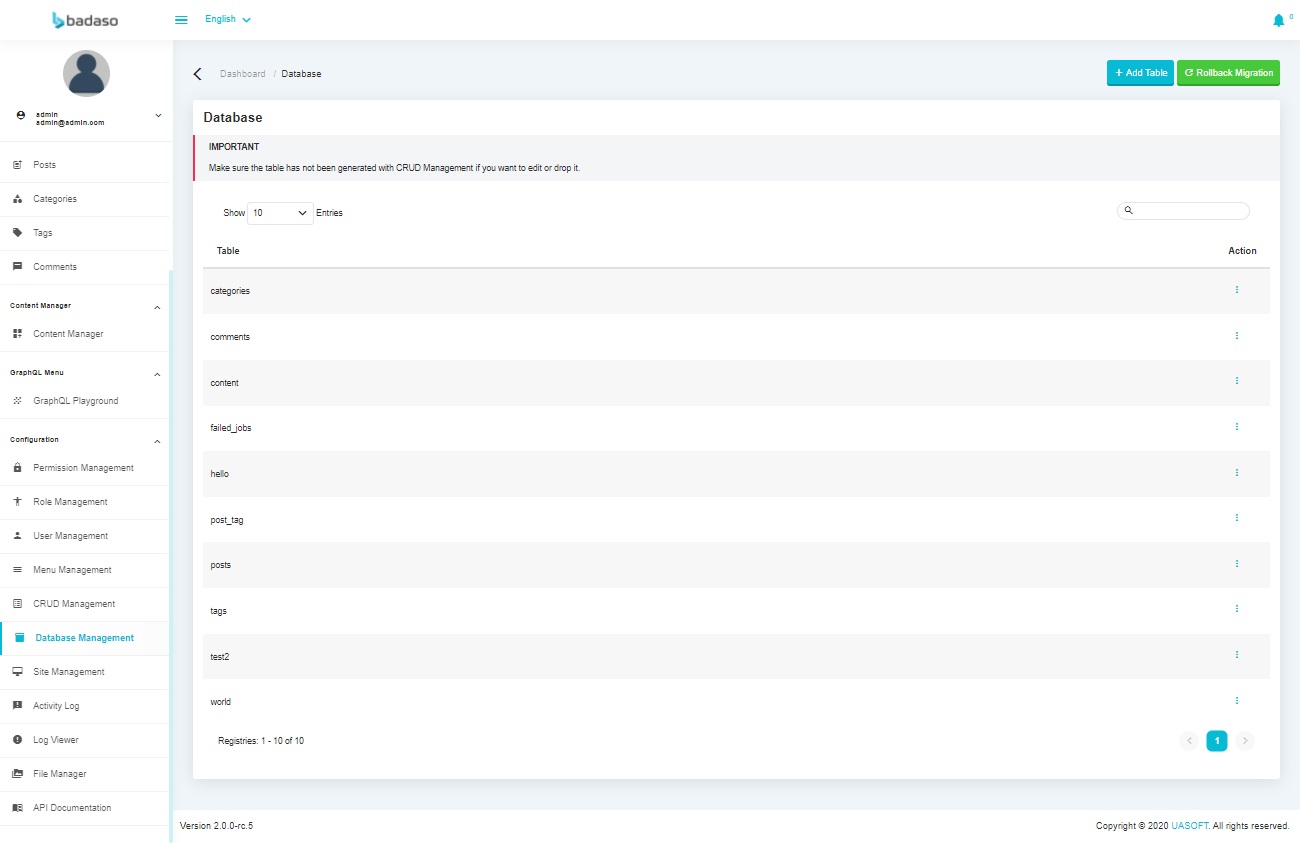
On this page you can also perform Rollback Migration, Alter Table and Drop Table.
caution
If you use this feature, then you cannot manually change laravel migrations or table properties. If there are changes that are not registered by Badaso, the migration will not sync or will not working properly.
info
Any changes made will be automatically generated a migration file.
Create Table#
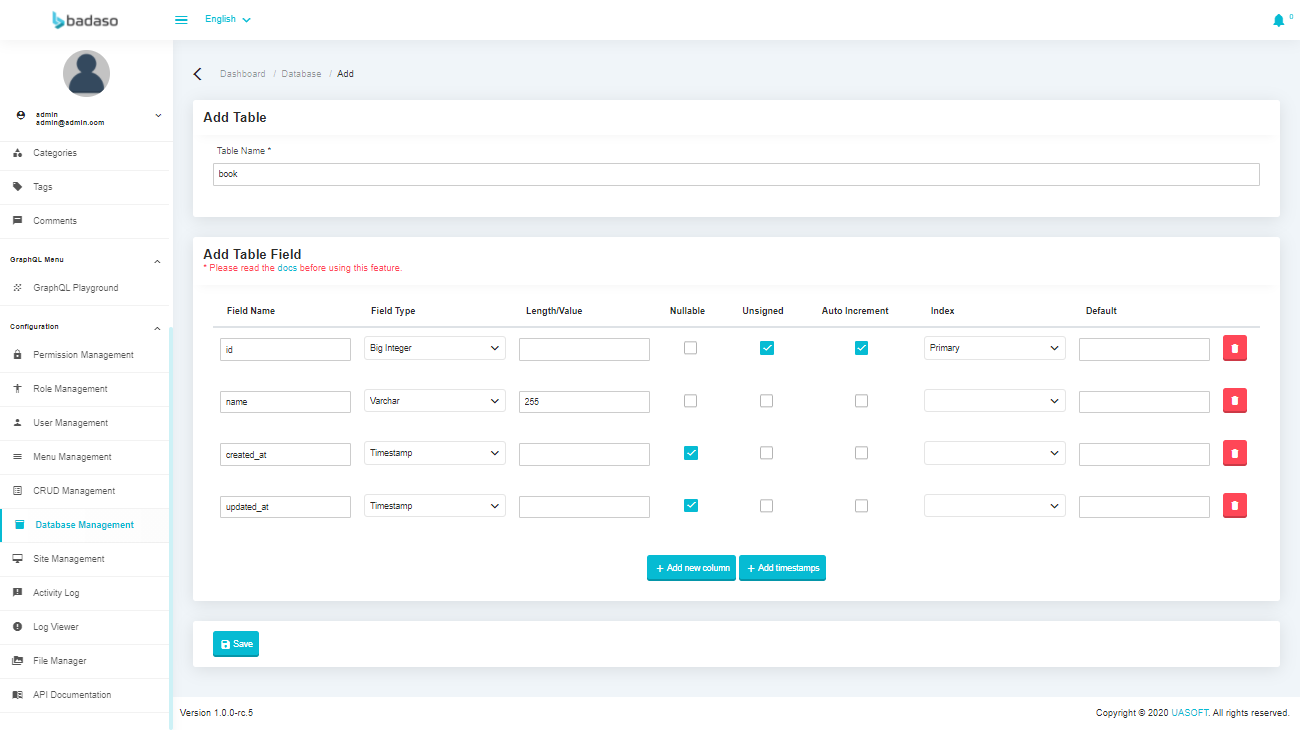
On this page you can create a new table. The following is a breakdown of the available fields.
Table Name: Input for a table name that only allows alphanumeric and underscore characters.Timestamp: If input is checked, the created table will have created_at and updated_at fields with the data type timestamp on the newly created table.Field Name: Input for the field names in the new table. This input only allows alphanumeric and underscore characters.Field Type: Input for the type of field in the new table.Length/Value: Input for length (varchar, char) or value (set, enum).- This field is required if the field type is varchar, char, set or enum.
- If the field type is varchar or char, the input value must be an integer or number.
- If the field type is enum or set, the input value must be an array with a comma separator (no spaces).
- If the field type is an integer, big integer, float or other then this input can function as a decimal point with a comma separator (without spaces).
Auto Increment: Input for auto increment on the table. Only one auto increment on the table is allowed. If the field type is empty when checking auto increment, then the field type will automatically becomes big integer and the index field becomes primary.Nullable: Input for a nullable field.Default: Input for the default field.As Defined: Input the value of the default field when selecting As Defined.Index: Input for the index field.Attribute: Input for field attributes.
Create Relationship Table#
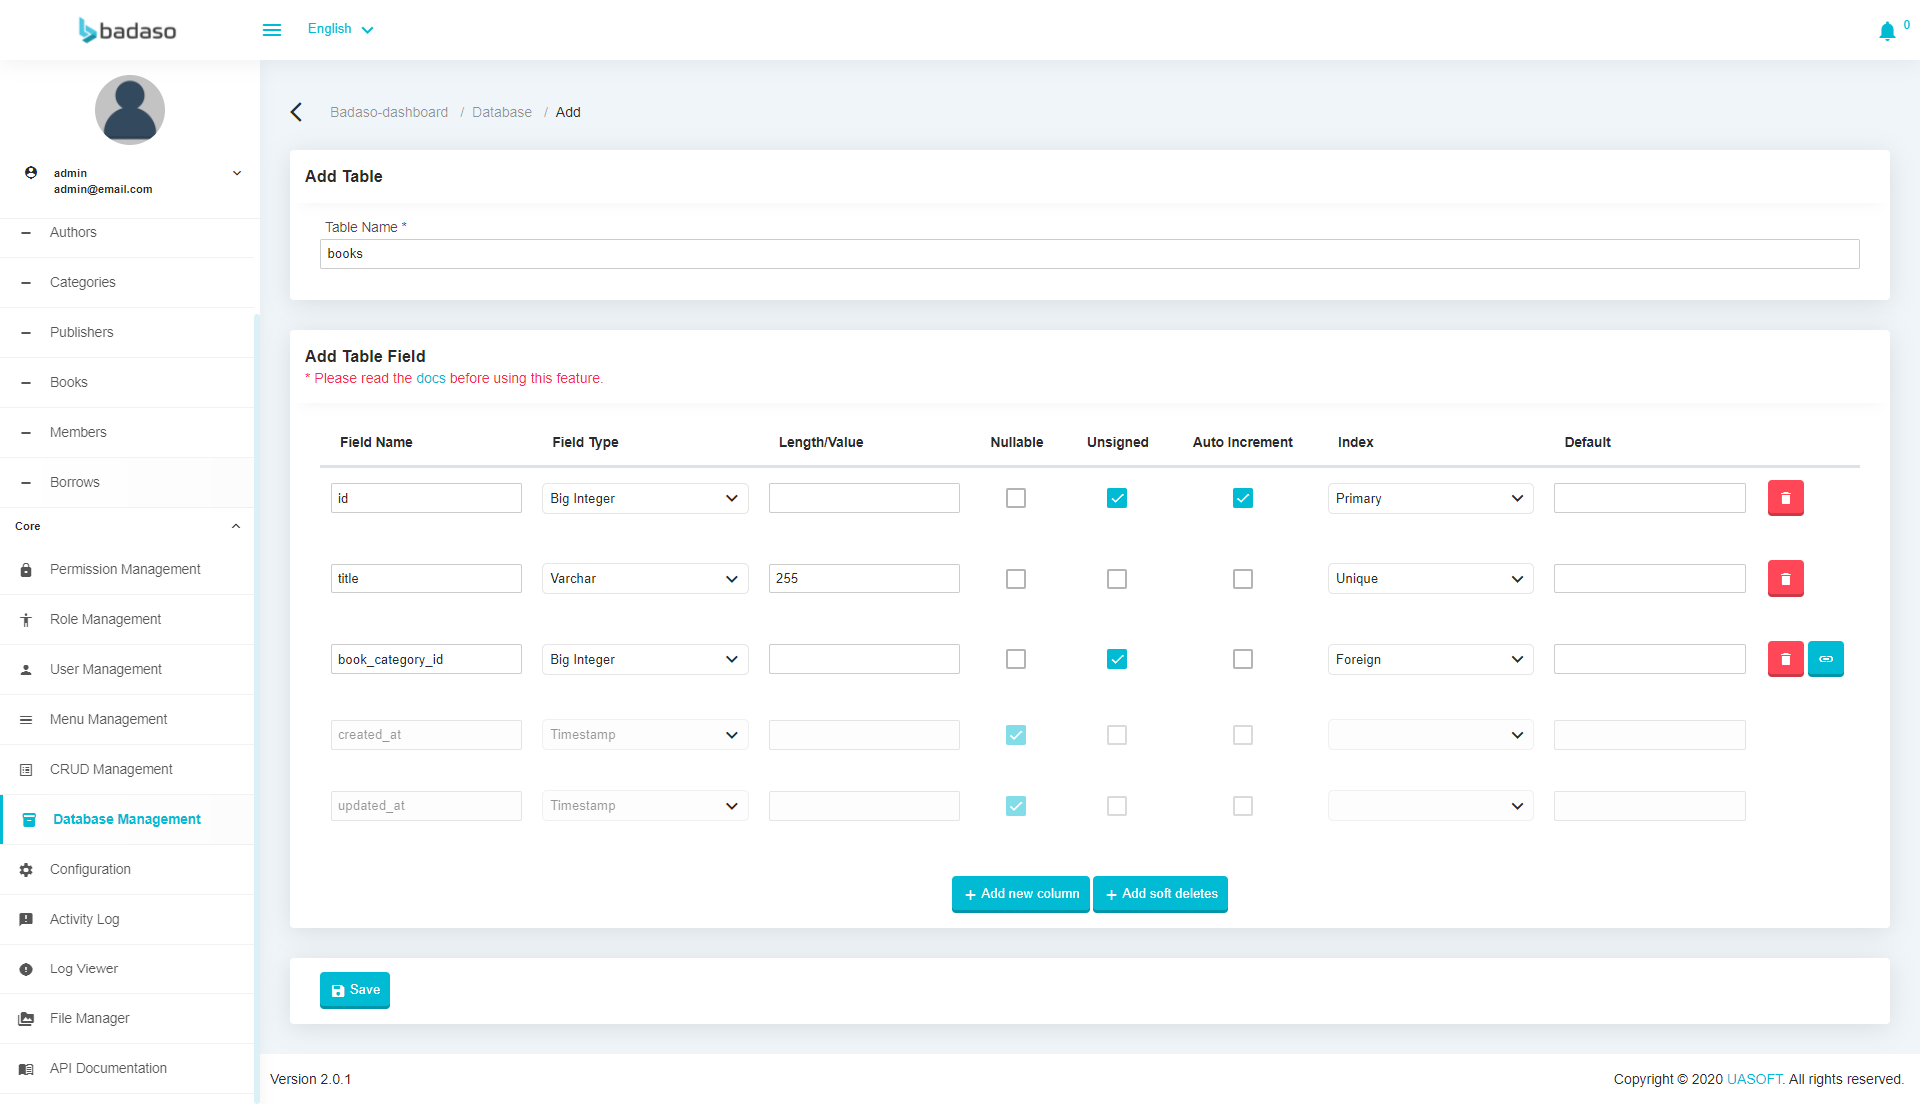
On this page you can create a new relationship table. The following is a breakdown of the relation fields.
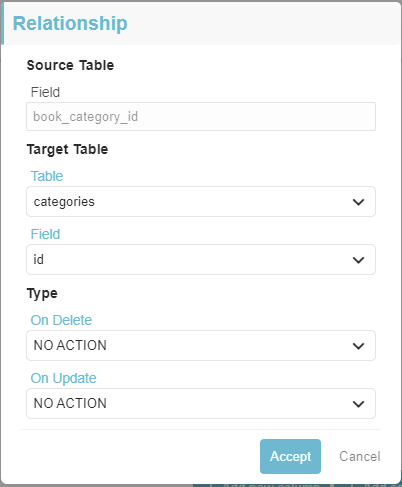
Field Name: Input for the field names in the new relation table. You can give this field name withdestination table_id. For example, you want to make a relation frombook_categoriestable tobookstable. Just named this field withbook_category_idatbookstable.Field Type: Input for the type of field in the new relation table. Make sure the field type is same like what you made at your destination table. Usually, it setted Big Integer.Length/Value: Just set it blank as default.Auto Increment: Don't check this box.Nullable: Input for a nullable field. If this field allow to send a null data, you can check this box. If this field is restricted with null data, then you don't need to check this box.Unsigned: Check this box.Index: Set it foreign then the relation button will show up on the right side of delete button and you can click into it.Relationshiptable: Select a destination table to make a relation.field: Select the field that you want to make a relation.On Delete: Select the delete action that you want after this field is related.On Update: Select the update action that you want after this field is related.
Alter Table#
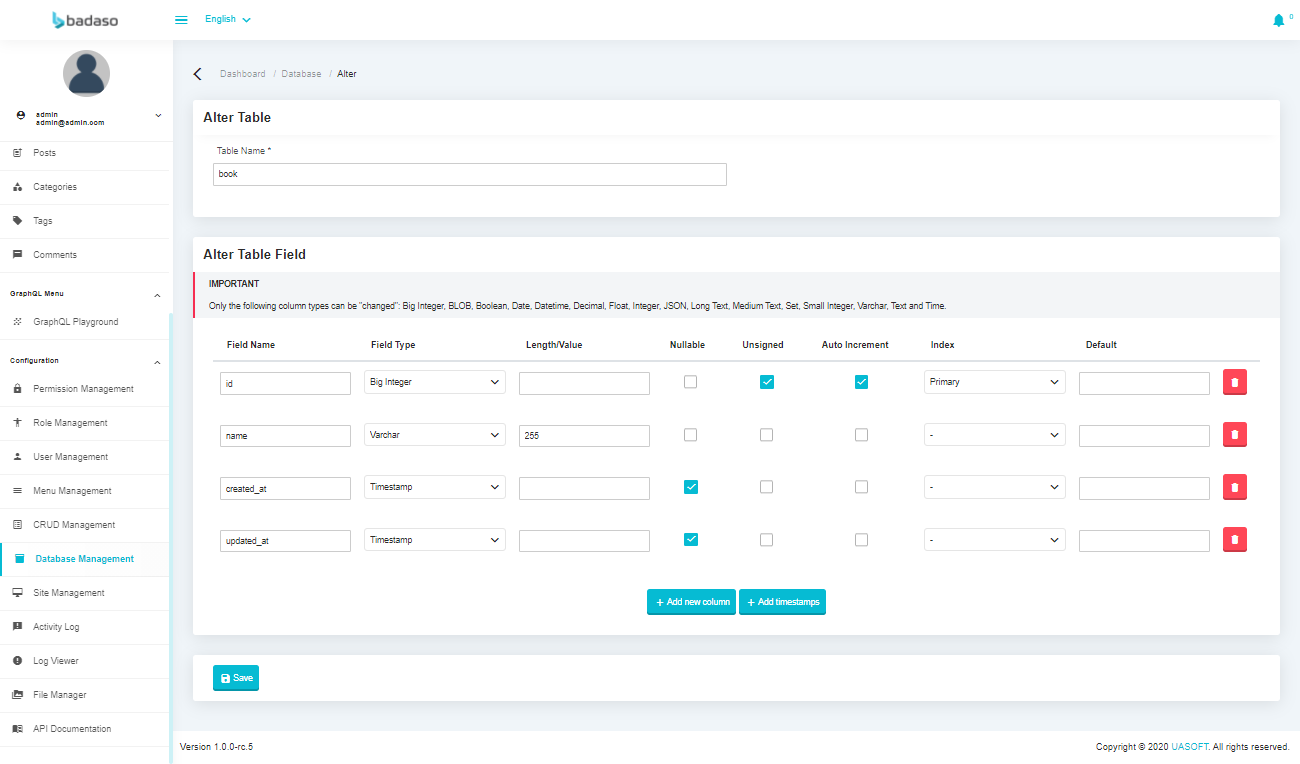
On this page you can make changes to your table such as adding fields, deleting fields, changing field details and changing the table name. The details of the fields are the same as in the Create Table.
info
A table's timestamp will be automatically detected if it has a updated_at field with the field type timestamp and a created_at field with the timestamp field type.
This is what the edit field looks like when altering the table.
Drop Tables#
On this page you can delete a table by pressing the Drop Table button.

Rollback Migration#
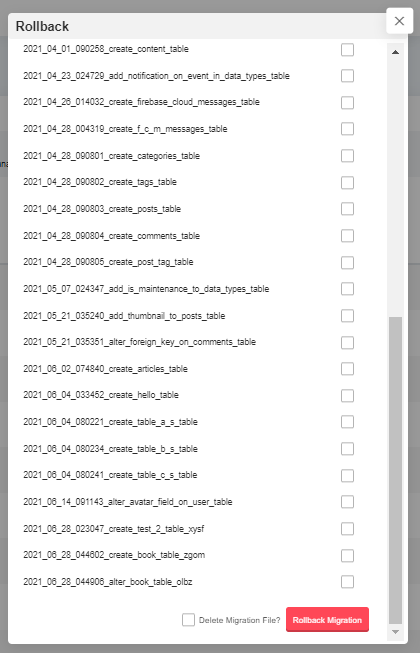
When you want to rollback a migration, check the desired limits and then press the Rollback Migration button. If you want to delete the migration files at once, then tick Delete Migration File.
Rollback Conflict#
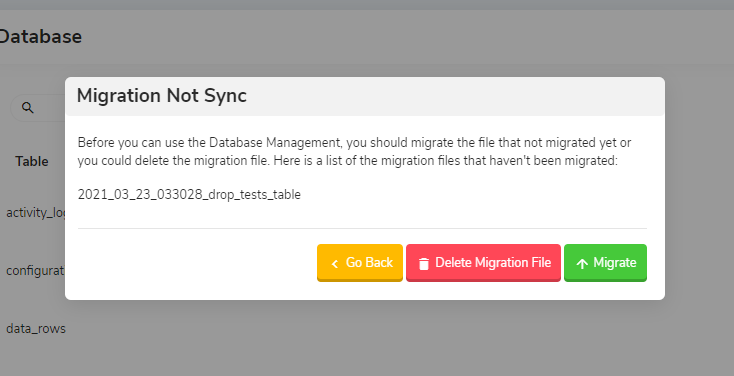
When the migration on the database does not match the migration files in your project folder, a conflict will appear as shown. To resolve this conflict, you are asked to migrate the migration file that is not synchronized or delete the migration file.
warning When a conflict occurs, you cannot do anything to Database Management. You must resolve this conflict first.
